 The
MT #1026 coupler I used on a Tomix 'Suhanefu 14' passenger car.
The
MT #1026 coupler I used on a Tomix 'Suhanefu 14' passenger car.Tomix passenger coach 'Suhanefu 14' MT conversion
> main > modeller's corner > couplers > Tomix > passenger coach
-
Tomix catalogue ref. 2522
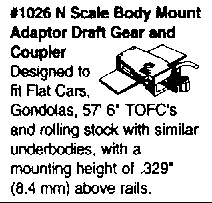
- MT coupler used MT #1026
- Mounting: body mount, suitable for
wider curves (30 cm or 12 inches and larger)
- Conversion by Mark Veneman
The
MT #1026 coupler I used on a Tomix 'Suhanefu 14' passenger car.
This model is typical for many Tomix passenger coaches, I expect that a similar conversion will convert the Tomix type 24 sleepers and type 14 day coaches and the type 14 'Joyful train' coaches as per the 'Euroliner' and 'Naniwa' sets. I converted the guard's cab side only. Normally passenger cars run as fixed rakes, with a guard's cab equipped car on both outer sides of the rake. Within the rake you can use any coupler you like. At the moment I still use rapido's but I would like to use Tomix 'TN' style couplers. These are again miniature 'buckeyes', but offer a stiffer coupling than MT's, thus reducing slack within a train. The result will be a smoother running set of coaches.
The rapido coupler is bogie-mounted on this model, the coupler pocket is on the end of a long tab on the bogie bolster. I decided to add a body mounted MT coupler, as the curves on my layout are rather wide. (30 cm, 12 inches). So, cut off the tab with the rapido coupler completely, using a #5 handle with a sharp blade or a piercing saw, after you have taken off the bogie from the coach (simply loosing screw). This is 'the point of no return'. The MT coupler I used is MT #1026, meant for flat cars and gondolas. Assemble MT-coupler as per the MT instructions. Please be careful, assembly is differrent as most other MT's and rather fiddly.
To mount the MT #1026 you need to file a notch in the end of the coach body. Use a small needle file and work patiently. Test fit the MT #1026. Mark the centerline of the coach underframe. Mark out the place where the hole for the coupler screw needs to be drilled. Drill the hole with the small drill from the MT starter kit using a pin vise. DO NOT USE a mini power tool, as these run too fast. The heat caused by the friction between the drill and the plastic will melt the plastic and may cause serious damage to your model. Test fit the MT #1026 again, using the screw provided with the MT #1026 kit. Check for coupler height using the MT coupler height gauge.
Finally, mount the MT #1026 permanently by gluing the coupler to the coach underframe. I used Revell 'Contacta' adhesive for styrene kits, which worked well. Do not forget the screw! Test coupler height and coupler operation. If all are OK your collection of MT equipped models has grown again!
![]() Back to
Tomix MT conversion overview
Back to
Tomix MT conversion overview
![]() Modelling
Modelling ![]() Layouts
Layouts ![]() Modeller's
Corner
Modeller's
Corner ![]() Train
Simulators
Train
Simulators ![]() Various
Various